Search This Blog

Thursday, June 19, 2014

Homemade Coconut Water, Fruit Popsicles

Ok guys first off I'm very sorry for no posts for almost 2 months! I have been very busy, I actually moved from one state to a complete different state! Now that I'm moved I should have time to put up more posts! Secondly my last post said I was going to review 4 different products, but later I erased it because before I new it the products were used and I hadn't taken pictures. Sorry to those that were looking forward to those 4 review, I can tell you the only thing I didn't like at all and shortly after I got it stopped using was the Tom's of Maine Botanically Bright toothpaste, I would not at all recommend that one. Ok now let's get to today's post, so today I'm going to share with you a healthy coconut water and fruit Popsicle recipe I saw on Pinterest.  I thought these Popsicles were really good, but I would recommend a different brand of coconut water. Ok lets get to the recipe!
                                          
  What you will need:


  • A variety of fruit (you can use fresh or frozen, I used a mixture)
  •  A bottle of coconut water
  • Popsicle molds ( I got mine at Home Goods for $12.99, I also got push up ones for $4.99 at Home Goods)
        How to prepare the Popsicles:


Step 1: Cut up all your fruit
Step 2: Fill your molds with coconut water  two thirds of the way
Step 3: Add the fruit and if needed top off with coconut water, then put them in the freezer over night


After you pop them out of the mold they will look like this, the 2 on the right are what they look like in the push up molds.

~ Hope ya'll enjoyed this, and if you try it out let us know how it went in the comments. Also if you have any questions ask me in the comments and I'll answer you! ~

Thursday, April 10, 2014

DIY Chamomile Face Scrub


 Today I'm going to share with ya'll my own recipe on how to make a chamomile face scrub.  Chamomile is GREAT for your skin, it has brightening, cleansing, disinfecting, and moisturizing properties. Chamomile is great for acne- prone skin, dry, and sensitive skin.  It also helps calm eczema, sunburn, rosacea, and wounds.  Now that you know the great things chamomile can do for your skin, I'm going to tell you about the exfoliating properties, the exfoliating agent in this recipe is almond meal.  The reason i picked almond meal, was because even though most people think sugar is a GREAT exfoliator, but in reality, it takes moisture out of your skin, and the granules can slightly cut your skin because sugar granules have tiny, sharp, jagged edges.  Sugar can also cause eczema, aging, acne, and rosacea , I mean if sugar isn't good for your body, why do people think it is good for your face, but if you use sugar and it works great for you, I'm not telling you to stop using it.  In reality, almond meal will never be as abrasive and effective as sugar is, but I have gotten drawn away from using sugar on my face.  Almond meal is an exfoliator, can moisturize your face, helps fight acne, and clear skin from impurities.  I used glycerin as the binder for this, I picked this, because it is non-comedogenic and on the scale, is not shown to break peoples skin out, glycerin is also VERY moisturizing, and can seal in moisture.  It also can brighten your skin, and I also didn't have any other non-comedogenic oils or binders.  I used vitamin E because, it is a preserver, and I love how it effects my skin, but you don't have to use vitamin E.  Now you know why I picked these ingredients lets get to the recipe!
 

What you will need:
  • 5 100% chamomile Tea bags (not used of course)
  • 2 Tablespoons of Almond Meal ( you could also use jojoba beads if you wanted, but sadly I don't have any)
  • 1 Tablespoon of Glycerin
  • Optional: 3 Vitamin E capsules
 
 Step 1: Mix all your dry and wet ingredients together, and mix. It's as easy as that!
 Step 2: It should be very crumbly and look like this, if you want it more together you could add more glycerin, or a bit of water. You can store it in a mason jar, or Tupperware, or even a plastic bag.

                                                                          Review:
 To use this put a small amount in your hand and add a tad of water and mix, then just massage it all over your face for like a minute.  You could let it sit on your skin for a few minutes, or just wash it off.
I used this scrub, and I LOVE it, it's the perfect amount of scrub for me, and it is pretty moisturizing, I'll give ya'll an update on how it's working, because I have only used this scrub once.

       ~If anyone tries this out, let us know how it went, if you have any questions or statements, just comment below, and I'm in dire  need of ideas on what ya'll want to see on my blog soooo, please let me know in the comments below what you want to see.~


Tuesday, April 8, 2014

Sorry for the lack of Posts!

Hey ya'll sorry for the lack of posts, I've been pretty busy lately.  New posts will be coming very soon, if you want a review or diy on something let me know and I'll try and do my best to make a post for you.  Thank you for viewing my blog, the views are going up every day, and it makes me happy that people take the time to look at my blog.  I hope ya'll keep visiting my blog to look for new posts, and enjoy reading and looking at the pictures I take.  I really enjoy making posts for ya'll and I hope ya'll are enjoying them.  I just wanted to say that I'm sorry for the lack of posts, and that I havent given up on my blog.  Feel free to comment questions, requests, or tell us if you have tried any of the diy's or any products featured on this blog.  Also if you want you go back and look at all the old posts I have done in February when I started my blog, all the way until the new posts that have been posted.
                            
                                                                 ~Hope you visit again~


Saturday, April 5, 2014

Review: 3 lip glosses

 Today I'm going to review for ya'll 3 different lip glosses, including the Almay Color&Care Liquid Lip gloss Balm in Blooming, the Hard Candy Glossaholic lip gloss in Sweet Peach, and two Essence XXXL shine Lip glosses in Dazzle Glow, and Bright Side of Life.Now lets get to the review.
From top to Bottom: Essence XXXL Shine Lip gloss in Bright Side of Life, Essence XXXL Shine Lip Gloss in Dazzle Glow, Almay Color&Care Liquid Lip Gloss Balm in Blooming Balm, and Hard Candy Glossaholic lip gloss in Sweet Peach

Essence XXL Shine Lip gloss:
  • Packaging: The packaging is a plastic tube with a metal like screw on cap, and has a flat long sponge applicator, and a long plastic stick connecting the applicator to the cap.  I think the packaging is OK, personally I don't like how long the packaging is, because I like to just like to apply lipgloss without people staring at me like I'm crazy, so I think its to long. I do like the clear tube with the silver cap though, and I also like how skinny the tube is.
  • Pigmentation: I think these lip glosses have the best pigmentation in all of the three different brands.  The color is very bright in the Bright side of life lip gloss, which is the orangy coral color.  Though Dazzle glow, can give you a slight white cast if you put too much on and don't blend it out enough.
  • Texture/stickiness: These lip glosses are also VERY comfortable to wear, and like they clame, they aren't very sticky at all, which is a big plus in a lip gloss.
  • Smell: these lipglosses are the worst smelling to me compared to all three other brands, they have a plasticy fruity smell. In my case I don't mind this smell too much, but I think other people might not like this as much.
  • Price: Compared to all other three lip-gloss brands, these are the most affordable.  These retail for $2.49 a piece at Ulta.  I think this is awesome , because these lip glosses are are VERY good lip glosses, so you could by all 12 for about $30 dollars in all.
Colors to choose from:
  • Dazzle Glow- Clear sparkly gloss
  • Bright Side of Life- Orangy coral gloss
  • Fabulous Fuchsia- Sparkly Fuchsia violate color
  • Pure Chic- Clear Gloss
  • Big Night Out- Mauvy, kind of Gloss
  • Glamour to go- Nudish, champane gloss
  • True Love- Wine, Berry gloss
  • Nude Candy- Baby pink, nude gloss
  • Red Blossom- Red sparkly gloss
  • Nude Kiss- Sparkly, darker baby pink, nude gloss
  • Just Georgeous- Watermelon, hot pink gloss
  • Pretty in Hibiscus- SPARKLY, redish, pink gloss
Almay Color&Care Liquid Lip Gloss Balm:
  • Packaging: This gloss has the best packaging in my opinion, it is very small and convenient for my "secret lip gloss applying". The screw on cap is a matte gray, and a short plastic stick connects to a small normal sponge applicator. The small packaging makes it not as noticeable that you are applying lip gloss.
  • Pigmentation: I think this lip gloss has a sheer wash of color, but it probably gets more pigmented the darker the color, but the color I got is very light therefore the pigmentation isn't as bright, but in my opinion it's a great amount.  If I get another color I will let ya'll know if it's more pigmented.
  • Texture/stickiness:  These glosses, don't really have the texture of a gloss, I feel like they are more moisturizing, and less sticky then most.The down fall, is that these aren't the glossiest glosses.
  • Smell: these glosses have a sweet kind of Halloween candy like smell, I love the smell of these.  Though  some people might think its  too sweet, but I don't think it is, but you will always have those people that don't like the smell. This gloss isn't the worst smelling or the best compared to the other three brands.
  • Price: Compared to all three lip gloss brands, these aren't the most expensive or most affordable. These retail for $4.47 at Walmart, I have found that these are cheapest at Walmart. Though Ulta retails them for $5.99, they are always having buy one get one 50 percent off , so that might give you a better deal. I think these are worth $4.47, because I'm planning to go buy another, so they are pretty good.I you bought all 10 colors it would cost you about 45 dollars.
Colors to choose from:
  •  Just Plum Good- Plum, berry gloss
  • Nudetrients- very pale nude gloss
  • Apple-a-day- bright redish, pink gloss
  • Lilac love- lilac, violet pink gloss
  • Pink Pout- Hot pink, watermelon gloss
  • Blooming Balm- dark baby pink, g loss
  • Cantelope Cream- Orangy coral gloss
  • Rosy Lipped- Mauvy Rose gloss
  • Apricot Picker-orangy, red color
  • Truffle Kiss- Brownish, mauve gloss
Hard Candy Glossaholic lip gloss:
  • Packaging: This gloss has a very big tube, and a black top that has a big plastic stick, which is connected to a very large spongy applicator.  I think the large applicator makes it fun to apply, so I think the concept is fun.
  • Pigmentation: I honestly can't answer this because the gloss I got is a very very sheer, almost clear sparkly gloss. Though I can't say how pigmentation is, this glitter in this gloss is not like I have ever seen. It has flakes of orangy yellow glitter, and also fine glitter in it. It is very pretty.
  • Texture/stickiness: This gloss is the stickiest out of all of the glosses, but it is the most glossy which takes over the slight stickiness. This gloss is also pretty thick, but I don't mind
  • Smell: in my opinion this is the best smelling gloss, it smells like vanilla cake or frosting (yum).  This glossaholic lip gloss, also has other glosses that are supposed to boost your mood or calm you down, one smells like coffee, and one like vanilla.  I don't have these glosses, I only have the one in the picture. Though, some people might think it is sickeningly sweet.
  • Price: These glosses are the most expensive compare to the other three brands, they retail for $5.00 a piece. Personally I don't think I will purchase another, but if I ever get the chance to try them out again I will, and will report ya'll on my second experience. If you bought all 8 glosses, it would cost you about 40 dollars.
Colors to choose from:
  • Chill out- clear, super bluish sparkly gloss
  • Rise & Shine- clear, super orangish sparkly gloss
  • Tipsy- hot pink sparkly gloss
  • Fabulous- dark red sparkly gloss
  • Fairy- baby pink sparkly gloss
  • Fireball- bright red sparkly gloss
  • Gorgeous-darkish baby pink sparkly gloss
  • Lush- orangy sparkly color
  • "New" holographic 3-d Carmel Twist- Holographic sparkly carmel gloss
  • Over the rainbow- Clear Holographic sparkly gloss
Over all:
  • Best Packaging- Almay Color&Care Liquid Lip Gloss Balm
  • Best Pigmentation- Essence XXXL shine Lip gloss
  • Best texture-Essence XXXL shine Lip gloss
  • Best Shine- Hard Candy Glossaholic Lip Gloss
  • Best Smell-Hard Candy Glossaholic Lip Gloss
  • Best Price- Essence XXXL Shine Lip Gloss
  • Best over All: Almay Color&Care Liquid Lip Gloss Balm
    ~Hope ya'll enjoyed reading my review, if you have tried any of these products, let us know how it went~

Sunday, March 30, 2014

DIY: Lush's "Angels on Bare Skin" Facial Cleanser


 Today I'm going to share with ya'll a recipe on how to make your very own Lush "Angels on bare Skin" Facial Cleanser. This cleanser is based off of the Lush facial cleanser. The main differences between this facial cleanser and Lush's is, one this cleanser wont be exactly like Lush's, two this one is WAY cheaper, and last this one might not smell the same. I wanted to make this cleanser because I think the concept of starting with a slightly dry paste and adding water to "revive" the cleanser is very cool. Also I actually have never tried lush's actual "Angels on Bare Skin Cleanser", in fact I have never tried any lush products (sadly :( , but I do one day want to try their products, and when I do I will review them for y'all). So now lets get started on how to make this!

 What you Need:
  • 3 Tablespoons of Almond meal
  • 1 Tablespoon of some kind of clay (I used Bentonite, but Lush's cleanser uses Kaolin)
  • 1 Tablespoon of Glycerine
  • 1 Tablespoon Rose water, witch hazel, or even distilled water (Lush just states their liquid as Water, but I feel that rosewater is better for your skin, I actually used Rosewater & Glycerin)
  •  At least 1 Tablespoon of Lavender (optional, but Lush uses this and it makes the cleanser smell and look better)
  • Essential oils(optional): I didn't use essential oils, but that is only because I don't have alot of essential oils, but you can use your favorite essential oil(s). The oils Lush uses are Lavender, Rose Absolute, Chamomile Blue, and Tagetes oil.
Lush also puts Benzoin Resinoid,  Limonene, and Linalool in their cleanser,Lush states that Benzoin Resinoid is a slightly aromic cleansing, anti bacterial, and anti inflammatory gum that comes from evergreen trees. Limonene is stated to be  a pale yellow lemon like smelling liquid that comes from some citrus, herb, and flower essential oils. Linalool is stated to be a colorless sweet odored liquid that occurs in many of the same essential oils as the Limonene does.

Step 1: In a bowl mix together all your ingredients except the lavender buds, until a crumbly paste is created.
Step 2: Flatten the mixture on parchment paper until it is a half of an inch thick, and sprinkle lavender buds on the top and press them in.


Step 3:Roll the mixture into a roll, and press together like in the picture, and lastly you can sprinkle more lavender buds on top of the roll. To store this put it in a airtight container I have mine in a mason jar. 

                                                         How it works:
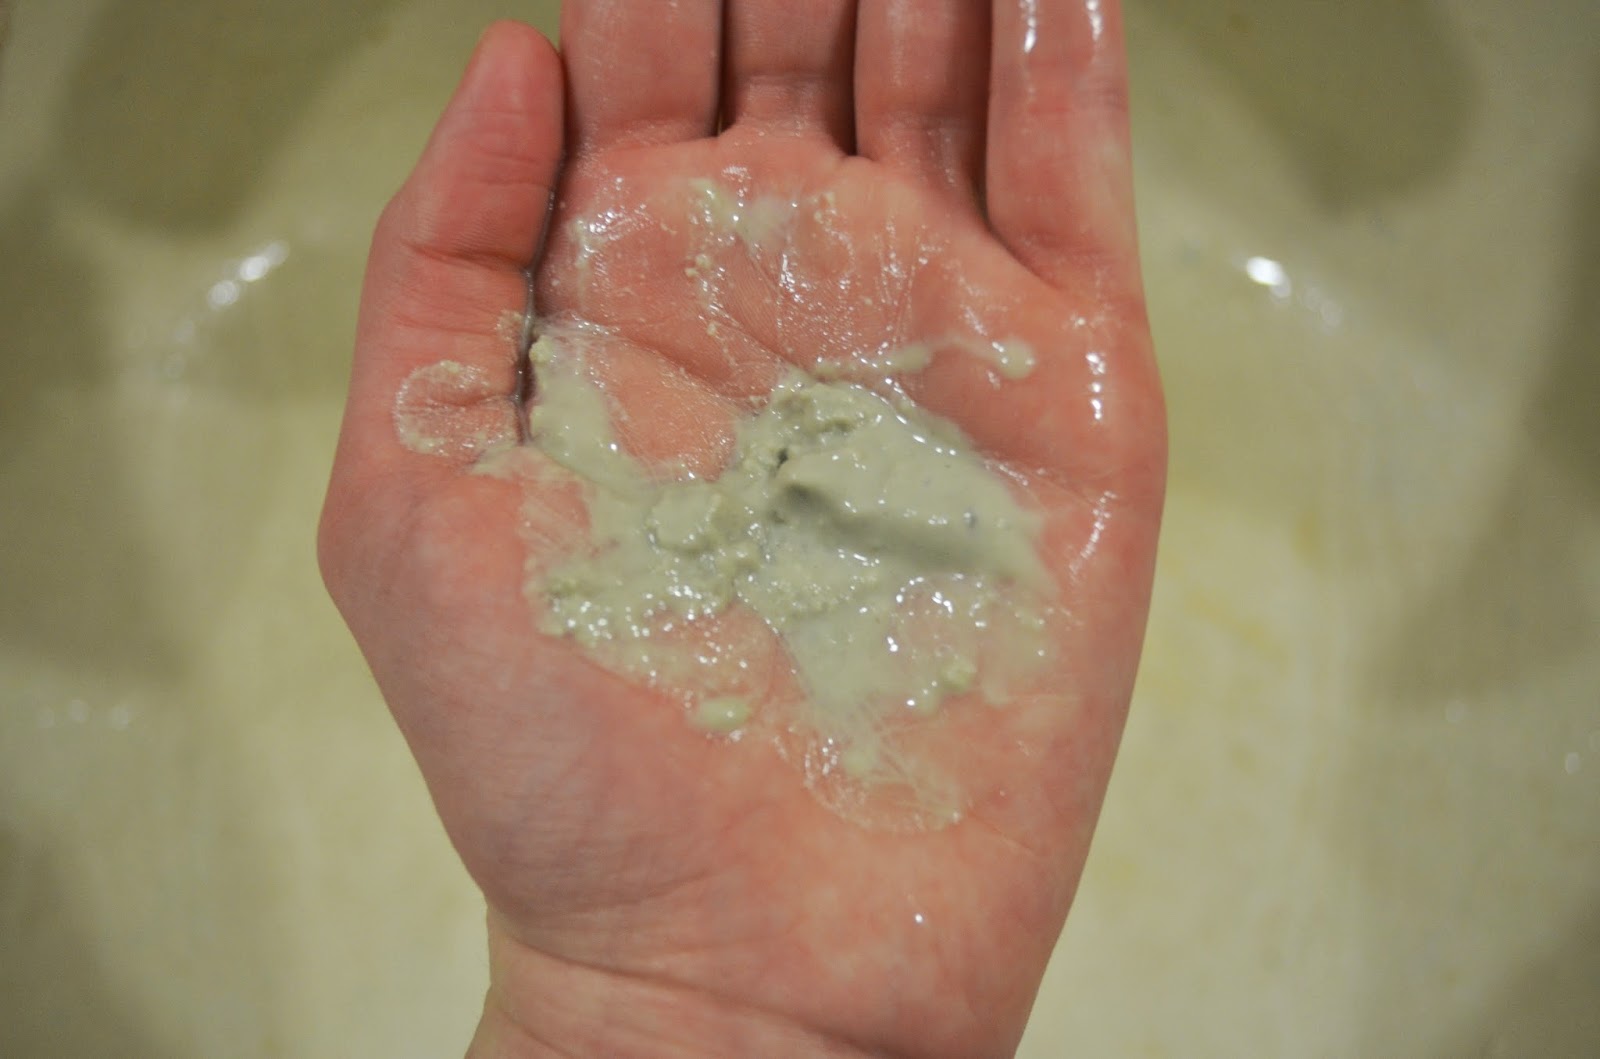
First take a pinch of the roll in the palm of your hand.

Next add water to the mixture and smoosh the paste in the water until you get your desired cleanser texture, then wash your face as normal with this product.

~If you try this out let us know how it went, and if you have tried the real lush cleanser let us know how it went~

Saturday, March 29, 2014

Ways to use Castile Soap

 
Today I'm going to share with y'all a few ways to use Castile soap. Castile Soap is a multi purpose, natural soap. This soap is made out of all natural ingredients including Coconut oil.  This soap comes in many different scents including peppermint and lavender, though the scent I have is the baby, unscented mild soap. I have also tried the peppermint too, the peppermint leaves your body and scalp feeling kind of cool and tingly. So now that y'all know what Castile soap is, lets get to the different ways to use Castile soap.
                                  DIY Body Wash&Shampoo:
The first way you can use Castile soap, is  that you can use Castile soap for a body wash, and shampoo (I use this as a shampoo every day an I LOVE it). If you want you could add essential oils to the Castile soap, especially if you have the unscented soap like me.
                                         DIY makeup remover:
The next way you can use it is, if you mix 1 cup of distilled water, 1/4 cup of olive oil, and 1/4 of a teaspoon if Castile soap in a jar, you can make your own makeup remover.
   DIY Facial cleanser:
You can also use Castile soap to make your own facial wash. All you need is a pump or squeeze bottle, enough Castile soap to fill your bottle an inch from the top of the bottle, and enough glycerin to fill the rest of your bottle. This cleanser works very well and foams a lot
  DIY dog shampoo:
Another way you can use Castile soap, is if you mix 1 cup of Castile soap, 1/4 of a cup of ground oatmeal, 2 tablespoons of aloe Vera, and optionally you could add a few drops of peppermint essential oils. This mix creates a cheap and easy dog shampoo.

Other uses for Castile soap:
•Toothpaste, this tastes REALLY bad though so I wouldn't recommend this
•Homemade house cleaner
•Laundry detergent
• and many more I can't think of right now

~if you have any ways you use Castile let us know what they are in the comments below~

Sunday, March 23, 2014

How to Bake French Macarons

 Today I'm going to share with ya'll a recipe on how to bake french macarons.  Macarons are french confections that are, two meringue style cookies with a filling in the middle sandwiched on top of each other. The cookies, though are not like normal cookies. They are very fragile so be very careful when putting filling in the middle of them. These cookies have a thin fragile, crunchy shell with a chewy center and they also have a trim of bubbles or the technical term is a foot. I'm trying to figure out what causes the foot, but have not yet found out.  If anyone knows the reason let us know in the comments below.  Sooooo. . .on that note lets getstarted!

          What you need:
  •  4 egg whites
  • 1/3 cups + 1 tsp of caster sugar
  • 1 1/2 cups + 4 tsp of powdered sugar this is also called icing sugar
  • 1 cup + 3 tsp of almond flour this is also called almond meal 
  • Optional: Food coloring, a splash of vanilla, or vanilla bean paste   
 Step 1: Put your egg whites and sugar in a hand or stand mixer and whip until light and fluffy, and your bowl can be turned upside down and nothing will come out.
Step 2: Add your food coloring and vanilla and combine, I would add more than I did, because after you add the rest of your ingredients the color changes slightly, and then when you bake it the cookies will get golden so, if you add more color the color will probably be brighter.
 Step 3: Sift the powdered sugar and almond meal twice(honestly  I didn't even sift it once) and fold into the egg whites.Do not over or under fold the mixture, or the feet on the cookies will not turn out right.  Only fold it 30-50 times. 
Step 4: Pipe the mixture on a cookie sheet covered with parchment paper, in small circles about 1 inch at the most apart, keep in mind that the circles will spread outAfter the macarons are piped let them sit for about an hour, or until a thin film forms on the outside of the macarons.While this is happening preheat your oven to 300 degrees Fahrenheit, and make your frosting. You can find fillings for your macarons online, their are fillings all the way from jams to butter creams. I made a vanilla bean buttercream for my macarons, here's the recipe.
What you need:
  • 1 1/2 cups of powdered sugar
  • 1/2 of a stick of butter
  • 1/4 cup of heavy whipping cream
  • a splash of vanilla extract, and some vanilla bean paste for the little flex of vanilla bean
Just whip the ingredients together, if the frosting is too thick just add more whipping cream, or milk.

By now the oven should be preheated, so put your macarons in the oven for 20 minutes. Then let them cool, and CAREFULLY pull them of the parchment paper.

Step 5: Lastly take some a cookie and some filling and put some filling on the flat side of the cookie, then sandwich another cookie on top with the flat side down.

Step 6: Enjoy your macarons!

  ~ If you have any questions feel free to ask in the comments, and if anyone has any suggestions on what I should put on my blog next leave it in the comments below.~