Search This Blog

Sunday, March 30, 2014

DIY: Lush's "Angels on Bare Skin" Facial Cleanser


 Today I'm going to share with ya'll a recipe on how to make your very own Lush "Angels on bare Skin" Facial Cleanser. This cleanser is based off of the Lush facial cleanser. The main differences between this facial cleanser and Lush's is, one this cleanser wont be exactly like Lush's, two this one is WAY cheaper, and last this one might not smell the same. I wanted to make this cleanser because I think the concept of starting with a slightly dry paste and adding water to "revive" the cleanser is very cool. Also I actually have never tried lush's actual "Angels on Bare Skin Cleanser", in fact I have never tried any lush products (sadly :( , but I do one day want to try their products, and when I do I will review them for y'all). So now lets get started on how to make this!

 What you Need:
  • 3 Tablespoons of Almond meal
  • 1 Tablespoon of some kind of clay (I used Bentonite, but Lush's cleanser uses Kaolin)
  • 1 Tablespoon of Glycerine
  • 1 Tablespoon Rose water, witch hazel, or even distilled water (Lush just states their liquid as Water, but I feel that rosewater is better for your skin, I actually used Rosewater & Glycerin)
  •  At least 1 Tablespoon of Lavender (optional, but Lush uses this and it makes the cleanser smell and look better)
  • Essential oils(optional): I didn't use essential oils, but that is only because I don't have alot of essential oils, but you can use your favorite essential oil(s). The oils Lush uses are Lavender, Rose Absolute, Chamomile Blue, and Tagetes oil.
Lush also puts Benzoin Resinoid,  Limonene, and Linalool in their cleanser,Lush states that Benzoin Resinoid is a slightly aromic cleansing, anti bacterial, and anti inflammatory gum that comes from evergreen trees. Limonene is stated to be  a pale yellow lemon like smelling liquid that comes from some citrus, herb, and flower essential oils. Linalool is stated to be a colorless sweet odored liquid that occurs in many of the same essential oils as the Limonene does.

Step 1: In a bowl mix together all your ingredients except the lavender buds, until a crumbly paste is created.
Step 2: Flatten the mixture on parchment paper until it is a half of an inch thick, and sprinkle lavender buds on the top and press them in.


Step 3:Roll the mixture into a roll, and press together like in the picture, and lastly you can sprinkle more lavender buds on top of the roll. To store this put it in a airtight container I have mine in a mason jar. 

                                                         How it works:
First take a pinch of the roll in the palm of your hand.

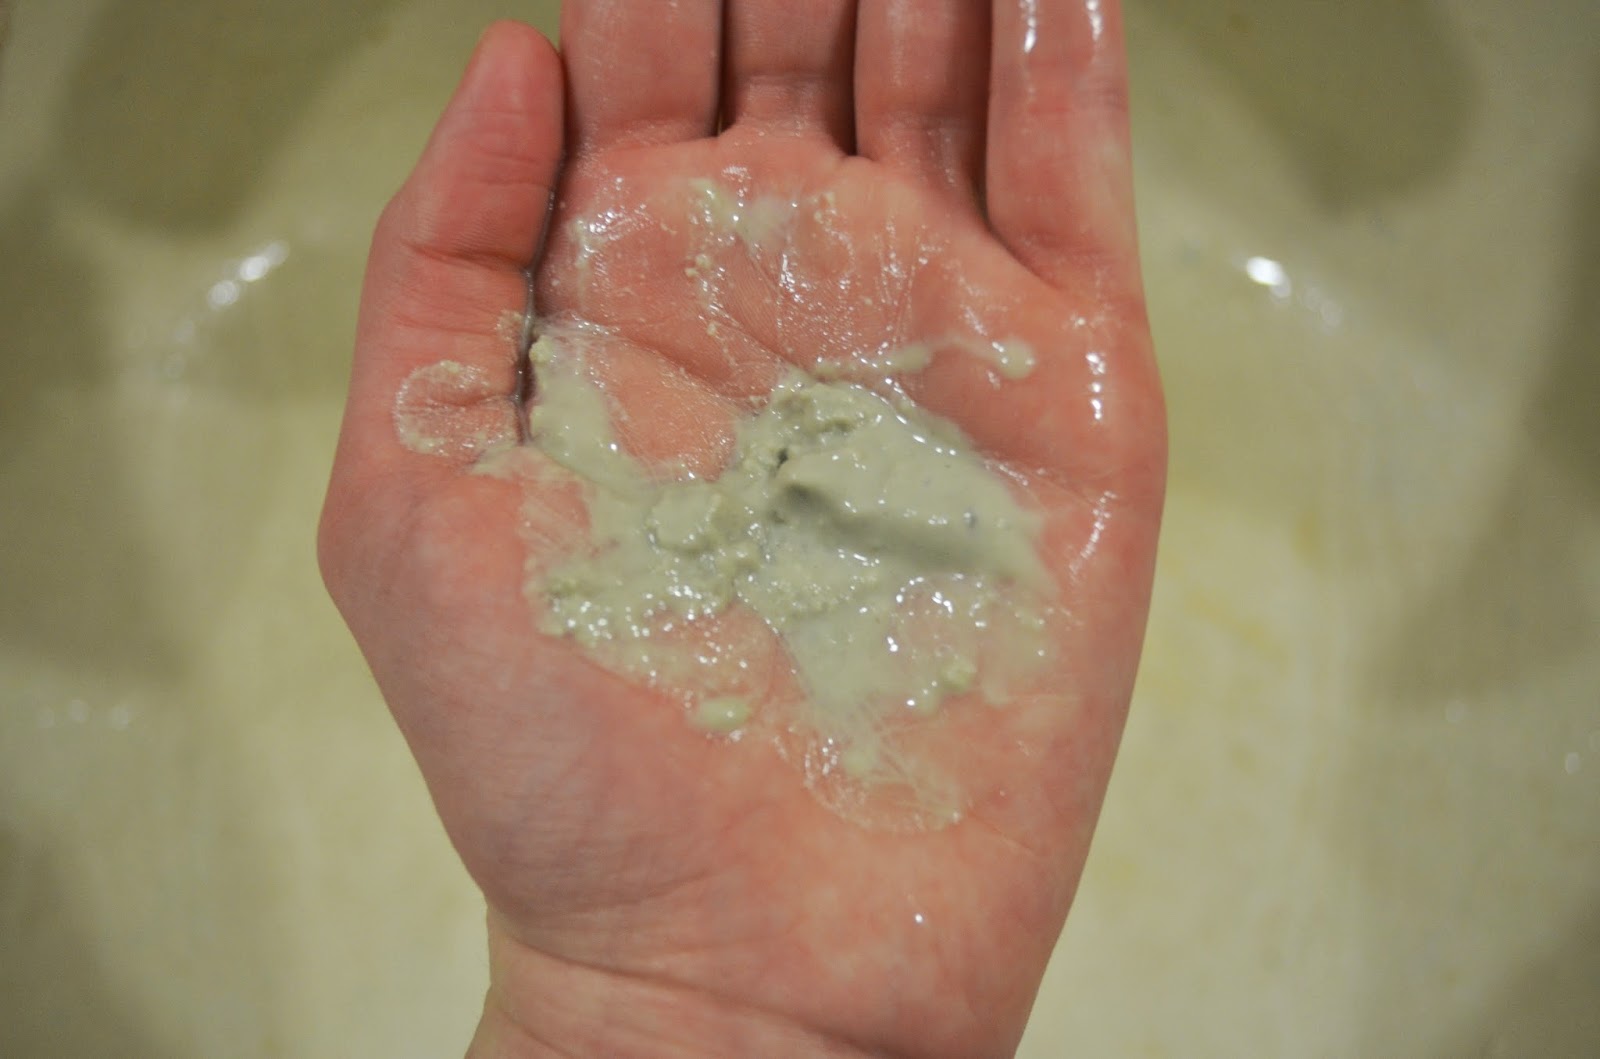
Next add water to the mixture and smoosh the paste in the water until you get your desired cleanser texture, then wash your face as normal with this product.

~If you try this out let us know how it went, and if you have tried the real lush cleanser let us know how it went~

Saturday, March 29, 2014

Ways to use Castile Soap

 
Today I'm going to share with y'all a few ways to use Castile soap. Castile Soap is a multi purpose, natural soap. This soap is made out of all natural ingredients including Coconut oil.  This soap comes in many different scents including peppermint and lavender, though the scent I have is the baby, unscented mild soap. I have also tried the peppermint too, the peppermint leaves your body and scalp feeling kind of cool and tingly. So now that y'all know what Castile soap is, lets get to the different ways to use Castile soap.
                                  DIY Body Wash&Shampoo:
The first way you can use Castile soap, is  that you can use Castile soap for a body wash, and shampoo (I use this as a shampoo every day an I LOVE it). If you want you could add essential oils to the Castile soap, especially if you have the unscented soap like me.
                                         DIY makeup remover:
The next way you can use it is, if you mix 1 cup of distilled water, 1/4 cup of olive oil, and 1/4 of a teaspoon if Castile soap in a jar, you can make your own makeup remover.
   DIY Facial cleanser:
You can also use Castile soap to make your own facial wash. All you need is a pump or squeeze bottle, enough Castile soap to fill your bottle an inch from the top of the bottle, and enough glycerin to fill the rest of your bottle. This cleanser works very well and foams a lot
  DIY dog shampoo:
Another way you can use Castile soap, is if you mix 1 cup of Castile soap, 1/4 of a cup of ground oatmeal, 2 tablespoons of aloe Vera, and optionally you could add a few drops of peppermint essential oils. This mix creates a cheap and easy dog shampoo.

Other uses for Castile soap:
•Toothpaste, this tastes REALLY bad though so I wouldn't recommend this
•Homemade house cleaner
•Laundry detergent
• and many more I can't think of right now

~if you have any ways you use Castile let us know what they are in the comments below~

Sunday, March 23, 2014

How to Bake French Macarons

 Today I'm going to share with ya'll a recipe on how to bake french macarons.  Macarons are french confections that are, two meringue style cookies with a filling in the middle sandwiched on top of each other. The cookies, though are not like normal cookies. They are very fragile so be very careful when putting filling in the middle of them. These cookies have a thin fragile, crunchy shell with a chewy center and they also have a trim of bubbles or the technical term is a foot. I'm trying to figure out what causes the foot, but have not yet found out.  If anyone knows the reason let us know in the comments below.  Sooooo. . .on that note lets getstarted!

          What you need:
  •  4 egg whites
  • 1/3 cups + 1 tsp of caster sugar
  • 1 1/2 cups + 4 tsp of powdered sugar this is also called icing sugar
  • 1 cup + 3 tsp of almond flour this is also called almond meal 
  • Optional: Food coloring, a splash of vanilla, or vanilla bean paste   
 Step 1: Put your egg whites and sugar in a hand or stand mixer and whip until light and fluffy, and your bowl can be turned upside down and nothing will come out.
Step 2: Add your food coloring and vanilla and combine, I would add more than I did, because after you add the rest of your ingredients the color changes slightly, and then when you bake it the cookies will get golden so, if you add more color the color will probably be brighter.
 Step 3: Sift the powdered sugar and almond meal twice(honestly  I didn't even sift it once) and fold into the egg whites.Do not over or under fold the mixture, or the feet on the cookies will not turn out right.  Only fold it 30-50 times. 
Step 4: Pipe the mixture on a cookie sheet covered with parchment paper, in small circles about 1 inch at the most apart, keep in mind that the circles will spread outAfter the macarons are piped let them sit for about an hour, or until a thin film forms on the outside of the macarons.While this is happening preheat your oven to 300 degrees Fahrenheit, and make your frosting. You can find fillings for your macarons online, their are fillings all the way from jams to butter creams. I made a vanilla bean buttercream for my macarons, here's the recipe.
What you need:
  • 1 1/2 cups of powdered sugar
  • 1/2 of a stick of butter
  • 1/4 cup of heavy whipping cream
  • a splash of vanilla extract, and some vanilla bean paste for the little flex of vanilla bean
Just whip the ingredients together, if the frosting is too thick just add more whipping cream, or milk.

By now the oven should be preheated, so put your macarons in the oven for 20 minutes. Then let them cool, and CAREFULLY pull them of the parchment paper.

Step 5: Lastly take some a cookie and some filling and put some filling on the flat side of the cookie, then sandwich another cookie on top with the flat side down.

Step 6: Enjoy your macarons!

  ~ If you have any questions feel free to ask in the comments, and if anyone has any suggestions on what I should put on my blog next leave it in the comments below.~


Wednesday, March 19, 2014

Spring/Beginning of Spring Favorites

Today I'm going to be telling ya'll my spring , or if you like to argue that it isn't yet spring, then my beginning of spring favorites.  I am fully aware that it isn't yet spring, but tomorrow is the first day and I am completely excited for spring. I would also like to put out their that all the products so far that I review on this blog are purchased by me and are not sent to me by companies, thought one day I do hope that companies would send me products to review, but until then I will purchase the products.  So on that note lets get started!


                                                                    Makeup product favorites:
  • Urban Decay Primer Potion in Sin
  • NYX Love in Paris Palette in the color Madeleines and Macaroons (specifically the the shade in the left in the top row) if you want a better picture of this I have a review of this palette.
  • Benefit's Benetint
  • NYX Single Eyeshadow in Nude
  • Elf Lip Exfoliator
  • Great Lash Waterproof Mascara
  • Maybelline Color Tattoo Eyeshadow in Barely Branded
  • Almay Liquid Lip Balm in Blooming
  • Elf Shimmer facial Whip in Lilac Petal
  • Ponds Luminous Finish BB+ in Light
  • Urban Decay Super Curl Curling Mascara

  Beauty and skincare favorites:
  • Eclos Cleansing oil, I have a review on this product if you want a review on this
  • Dial Frozen Yogurt Body Wash
  • Dr. Bronners  Baby Castile Soap, I like to add essential oils to this, like orange
  • Lumene Vitamin C Dry Skin Cocktail
  • Olay Complete SPF 15 Sensitive Moisturizer

          Random Favorites:


  • Now Orange Essential Oil
  • Scentsational Green Tea Candle
  • DIY Orange Linen Spray(FYI this is my second bottle, and I have a tutorial on how to make this)
  • My lavender plants, which aren't pictured, but I am in the making of posting a post on how to grow the seedlings from lavender seed, but these are my other seeds I need to plant, these are chamomile seeds


                                                                        Food Favorites:


  • Talenti Sea Salt Carmel Gelato (this stuff is heavenly, it has chunks of chocolate covered Carmel pieces, they remind me of miniature square truffles)
  • Homemade Baked Oatmeal with brown sugar, cinnamon, and apples on top( let me now if ya'll want a tutorial on how to make this)
  • Spring rolls with vegetables, noodles, and peanut sauce inside (Let me also know if ya'll want a tutorial on how to make this
  ~Hope ya'll enjoyed this post, if you have tried any of these things, let us know what you think, and if you want a review or tutorial on any of these things let me know~

DIY: Lipbalm

 Today I'm going to share with ya'll a recipe on your own lip balm. Lip balms' costs add up over, so instead of paying for thousands of them like we all do, you can make your own.  These lip balms are very customizable and easy to make. So lets get to it!

What you will need:
1 Tablespoon of beeswax
1/2 Tablespoon of cocoa butter
1 Tablespoon of coconut oil
Optional:1/2 Tablespoon of honey, a few drops of essential oil, and a few capsules of vitamin  E oil
 
 Step 1: Add the beeswax,cocoa butter, and coconut oil in a bowl and melt in 30 second intervals in the microwave until melted.


 Step 2: add your vitamin E oil, essential oil, and honey if desired. You need to work very quickly!

 Step 3: Stir in the added ingredients until the mixture has thickened and the ingredients are incorporated very well.  If necessary you can melt the ingredients again before you do this step.

Step 4: Enjoy your new lipbalm!

          ~If you try this out let us know how it went~

Tuesday, March 18, 2014

How to Make Homemade Chocolate Chip Clif Bars

Hey ya'll today I'm going to share with ya'll my own recipe on how to make your own chocolate chip clif bars.  These bars are very good and kind of close to the real Clif bars, but the texture and taste is still slightly off.  Though, Clif bars are VERY expensive , so I decided to try and make my own recipe. Hope ya;ll enjoy the recipe and if you try it let me know how it went. Now lets make it!

What you will need:
  • 1cup quick cooking oatmeal
  • 1/2 cup of chocolate chips
  • 1/2 cup of crushed nuts, I used almonds
  • 20 dates
  • 1/4-1/2 cup honey
  • a pan
  • Optional: 1/4 cup of flaxseed or chia seeds
  • Optional: I ended up adding a little bit of water, maybe 1/8-1/4 cup

 Step 1: Crush your almonds or nut of choice, in a food possessor, or you could also use a meat pounder and a plastic bag like I did.
 Step 2: Mix together your dry ingredients
 Step 3: Mash your dates, in a food possessor or with a plastic bag and meat pounder.
 Step 4: Add the rest of your ingredients and mix well, I ended up using my hands for this step.
 Step 5: Press the mixture in a small square pan, make sure to press down REALLY well, if you don't they will fall completely apart. Over time the bars will get more solid.
Step 6: Enjoy your cheaper alternative to Clif bars, store these bars in a plastic bag.

DIY: Whipped Citrus Body Scrub

 Hey ya'll sorry for the lack of posts I have been very busy lately, but today I'm going to be posting 2-3 new posts. This post is going to be on a DIY whipped citrus body scrub, I thought this would be a great scrub to kick off the beginning of spring coming up in 2 days. For this scrub you can use any citrus fruit, and can even add crushed mint, rosemary or whatever herb you might want to add to your scrub. So now lets get to it!

Ingredients:
  • Juice of 1 small to medium lemon, orange, or grapefruit I personally had too much juice, but it turned out ok.
  • 1-2 tablespoons of your citrus zest
  • 1 to 1 1/2 Tablespoons of honey
  • 3/4 cups coconut oil
  • 1-2 cups of sugar
 Step 1: First melt your coconut oil, and freeze to where their is a film of hardened coconut oil on top, if you want more information on how to do this look at my DIY Shaving Cream post. Next zest your citrus fruit, and then juice it. A tip for juicing a lemon is to roll it on the counter before you cut the lemon.
 Step 2: Put your zest in your lemon juice. By this time your coconut oil should be slightly hard, next whip it with a hand or stand mixer on high until whipped.
 Step 3: After your coconut oil is whipped add your juice, zest, and honey mixture to the coconut oil, continue whipping. Lastly add the sugar and whip until whipped.
Step 4: Enjoy your new body scrub, and wash away that dull winter skin, and enter spring with smooth glowing skin.

Monday, March 10, 2014

DIY Brightening Face Mask

Today I'm going to share with ya'll a recipe for a DIY Brightening Face Mask. This face mask takes maybe 5 minutes at the most and only 4 ingredients. This mask is very effective, I use this mask 1 or 2 times a week, after I have cleansed my face. This mask brightens your skin and also moisturizes your face. NOw lets get to the ingredients.

 
Ingredients:
  • 1 egg yolk
  • 2 Tablespoons of flour
  • 1 Tablespoon of Honey
  • 1 Tablespoon of Organic Apple Cider Vinegar
  •  Optional: Water
When you have your ingredients in your bowl mix them together and if the mixture is to thick add water until the texture is to your own liking. Apply on your face and leave on until dry this could take 15-20 minutes maybe even more. Take off with warm water, this part is a little difficult.

What makes this mask great:
  • Egg yolks are not only good for breakfast, but also are good to make your skin glow, be moisturized, prevent aging, and help with acne.
  • Flour helps your skin whiten, helps with pimples, facial hair, help with dry skin, and flour helps with oily skin.
  • Honey is so amazing for your skin, it lightens acne scar, moisturizes your skin,cleans your skin, and helps with acne.
  • Apple Cider Vinegar helps with age spots, acne,  and regulate the PH of your face.
~If you try this out let us know how it went, and if you have any questions feel free to ask~
 

Review: NYX Butter Lip Balms

 Today I'm going to be reviewing the NYX Butter Lip Balms these have been out for a while, and they retail for $3.99 a piece.Though they are $3.99 a piece I ended up getting them for free because of an offer Ulta members got in the magazine. The two colors I have are on the left Macaroon, and on the right Ladyfingers.These lip balms are very sheer and very moisturizing. Though, these lip balms are not nearly as pigmented as a lipstick would be, especially the Macaroon color.
Pros:
  • Small Packaging
  • Smells good
  • Ladyfinger color has great pigmentation 
  • Smooth texture
  • Moisturizing
Cons:
  • Macaroon color is to sheer for me on my lips
In all this product is fairly good.  Go pick up one or maybe even five of the 8 colors.


~If you have tried this product let us know how it went, and if their are any questions feel free to comment  below~

Thursday, March 6, 2014

DIY: Shaving Cream

Hey Guys today I'm going to share my own recipe for homemade shaving cream. You can make this have any scent, and If you wanted to you could even add color.  This recipe makes about 2 and 1/2 1 pint mason jars full which that is about 8 or 9 cups.  This shaving cream is safer for your skin than other ones, and will save you money on shaving creams. Now lets get to it.
 What you need:
  • 1 Bar of Sensitive Dove Soap, you could also use any other kind of bar soap you have
  • 30-40 drops of essential oils or until your shaving cream smells good to you
  • 1 1/2 cups water
  • 2/3 cups coconut oil
  • Stand or hand mixer
  • Not pictured in the picture is 2 vitamin E capsules
  • Optional: Food Coloring (I don't recommend this)
Step 1: Bring 1 and 1/2 cups of water to a boil and while that's boiling grade your bar of soap. After your water is boiling add all the grated soap and pop your Vitamin E capsules and add to the mixture, boil the mixture for 5-10 minutes stirring constantly boil until when you lift your spoon out you don't see soap flakes in the mixture. After pour into a cup and put in freezer or fridge to cool.
Step 2: melt the coconut oil in the microwave on 30 second bursts, then put that in a bowl and add essential oil until desired smell is achieved, this smell will change when soap is added. After this is done put the bowl into the freezer to the point where their is a layer of solid coconut oil, but this can be busted to reveal a more melted coconut oil, I accidentally left mine to long so it was more solid this caused me to have to keep mixing it during the whipping process. After the freezer you want to whip the coconut mixture until light and soft.


Step 3: Lastly add 3/4 of the mixture of soap mixture to the coconut oil and whip until texture is like shaving cream. The texture is VERY shaving cream like.I decide to store my shaving cream in 1 pint jars, one of my jars I decide to seal, for preservation.

 ~If you try this out let me know how it went, and if you have questions feel free to ask.~